Best Hair Transplant Surgeon in Chandler, Arizona
You are exploring the delicate world of hair restoration, a journey that demands precision, artistry, and an unwavering commitment to patient well-being. When considering a hair transplant in Chandler, Arizona, your focus inevitably turns to identifying the surgeon who can navigate this complex procedure with expertise and deliver outcomes that exceed your expectations.
This guide aims to equip you with the knowledge to make an informed decision, dissecting the essential criteria and highlighting key considerations in your search for the best hair transplant surgeon in Chandler.
Before delving into the specifics of surgeon selection, it’s crucial to grasp the fundamental techniques employed in modern hair transplantation. These methods are the bedrock upon which your future hairline will be built, and understanding them empowers you to communicate effectively with potential surgeons.
Follicular Unit Transplantation (FUT)
Often referred to as “strip harvesting,” FUT involves excising a strip of skin from the donor area, typically the back of your head, where hair is naturally resistant to balding. This strip is then meticulously dissected under high-powered microscopes into individual follicular units, each containing one to four hairs. These units are then transplanted into the recipient areas where you experience hair loss.
- Donor Area Management: The strip harvest leaves a linear scar, which is generally well-concealed by surrounding hair, especially if the hair is kept at a moderate length. The size of the strip is determined by the number of grafts required and the density of your donor hair.
- Graft Dissection: This phase is critical as it directly impacts graft survival. Highly skilled technicians, working under the surgeon’s supervision, carefully separate the follicular units, preserving their delicate structure.
- Recipient Site Creation: The surgeon creates tiny incisions in the recipient area, strategically mapping out the new hairline and density. The angle, direction, and distribution of these incisions are paramount for a natural-looking result.
Follicular Unit Extraction (FUE)
FUE is a more recent technique that involves individually extracting follicular units directly from the donor area using a micro-punch tool. This method eliminates the linear scar associated with FUT, leaving only tiny, punctate scars that are virtually undetectable, even with short hair.
- Punch Size and Graft Quality: The diameter of the punch tool used can vary. Smaller punches (0.8mm-1.0mm) reduce scarring but require greater precision. The quality of the extracted graft is vital, as transection (damage to the follicle during extraction) can reduce graft survival.
- Donor Area Considerations: While FUE avoids a linear scar, over-harvesting from a specific donor area can lead to visible thinning. A skilled surgeon will carefully distribute the extractions across the donor region to maintain its aesthetic integrity.
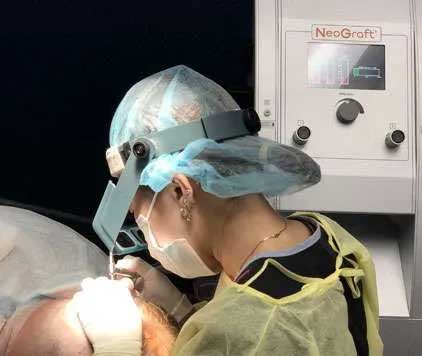
- Manual vs. Robotic FUE: Both manual and robotic systems exist for FUE. Manual FUE relies entirely on the surgeon’s skill and dexterity, providing consistent control. Robotic FUE systems offer consistent extraction but may have limitations with graft angles and challenging donor hair types.
Combination Procedures
In some cases, particularly for extensive hair loss, a surgeon might recommend a combination of FUT and FUE. This approach allows for a greater number of grafts to be transplanted in a single session, leveraging the advantages of both techniques.
- Maximizing Graft Yield: A combination approach can effectively maximize the number of viable grafts, especially when your donor hair is limited.
- Scarring from FUT will still be present; the ability to harvest additional grafts via FUE allows for a more comprehensive restoration.
If you’re considering a hair transplant and are looking for the best options in Chandler, Arizona, you might find it helpful to explore related information on hair restoration techniques. For instance, an insightful article on hair transplants can be found at this link: Hair Transplant in Tampa, Florida. This resource provides valuable information on procedures, benefits, and what to expect, which can aid your decision-making when searching for a top surgeon in your area.
Identifying Qualifications and Experience
The foundation of a successful hair transplant lies in the surgeon’s qualifications and their demonstrable experience. These are not merely accolades but indicators of their commitment to the profession and their ability to consistently deliver high-quality patient care.
Board Certification
Board certification is a critical benchmark. For a hair transplant surgeon, board certification from the American Board of Hair Restoration Surgery (ABHRS) is highly indicative of specialized expertise. While other board certifications (e.g., in Dermatology or Plastic Surgery) are valuable, ABHRS certification specifically validates a surgeon’s knowledge and skill in hair restoration.
- Rigorous Examination: Achieving ABHRS certification involves a comprehensive examination covering all aspects of hair transplant surgery, from diagnosis and patient selection to surgical techniques and post-operative care.
- Continuing Education: Board-certified surgeons are often committed to ongoing professional development, staying abreast of the latest advancements and techniques in the field.
Years in Practice and Specialization
Just as a master artisan refines their craft over time, a hair transplant surgeon’s expertise deepens with years of dedicated practice. Look for a surgeon with a significant number of years specifically performing hair transplant procedures, not just general surgical procedures.
- Volume of Cases: Inquire about the number of hair transplant procedures the surgeon performs annually. A high volume often correlates with greater experience and a refined understanding of various hair loss patterns and patient needs.
- Specialization Focus: A surgeon who primarily focuses on hair restoration, rather than treating it as a secondary service, is more likely to be at the forefront of the field and possess a nuanced understanding of its intricacies.
Professional Affiliations and Memberships
Membership in respected professional organizations within the hair restoration community signifies a surgeon’s commitment to ethical practices and staying current with industry standards.
- International Society of Hair Restoration Surgery (ISHRS): The ISHRS is a global non-profit medical association dedicated to advancing the art and science of hair restoration. Membership suggests engagement with the broader hair restoration community and access to shared knowledge.
- American Academy of Dermatology (AAD) or American Society of Plastic Surgeons (ASPS): While not specific to hair restoration, membership in these broader organizations indicates a commitment to general medical excellence and ethical conduct.
The Importance of an Artistic Eye

Hair transplantation is as much an art as it is a science. The ability to create a natural-looking hairline, mimic natural growth patterns, and seamlessly blend transplanted hair with existing hair requires an inherent artistic sensibility. This is where a surgeon distinguishes themselves from a mere technician.
Hairline Design and Naturalness
The hairline is the frame of your face, and its design is paramount to a natural outcome. A skilled surgeon will customize the hairline to your facial features, age, and natural hair growth patterns.
- Irregularity and Feathering: Natural hairlines are not perfectly straight. A good surgeon will create a subtle irregularity and a “feathered” edge, with single-hair follicular units placed at the very front, followed by two-hair and then three-hair units. This mimics the gradual increase in density seen in natural hair.
- Temporal Peaks and Density: The design extends to the temporal peaks (the corners of the hairline) and to the overall density, ensuring a balanced, age-appropriate look result.
Graft Placement and Direction
Each individual follicular unit must be meticulously placed at the correct angle and direction to ensure it grows naturally and blends seamlessly with your existing hair. This requires precision and foresight.
- The surgeon must have a deep understanding of scalp growth patterns across different scalp regions. Hair at the front grows forward, hair at the crown forms a swirl, and hair on the side grows backward.
- Micro-Incisions: Creating recipient sites requires extreme accuracy. The angle and depth of these tiny incisions dictate the future growth direction and projection of the transplanted hair.
Consideration of Future Hair Loss
A truly skilled surgeon will not only address your current hair loss but also consider the potential for future hair loss. This involves a long-term strategic approach to ensure your results remain natural and aesthetically pleasing as you age.
- Donor Hair Conservation: Knowing that your donor hair is a finite resource, a responsible surgeon will plan graft harvesting and placement with future needs in mind, avoiding over-harvesting.
- Progressive Loss Planning: They will discuss the potential for further hair loss in non-transplanted areas and may recommend adjunctive therapies (e.g., finasteride, minoxidil) to preserve existing hair.
Assessing Patient Reviews and Testimonials

While qualifications and artistic skill are paramount, understanding previous patients’ experiences offers valuable insight into a surgeon’s practice, patient care, and the overall patient journey. Think of these reviews as a window into the lived experience of others who have walked this path before you.
Online Review Platforms
Platforms like Google Reviews, RealSelf, and Healthgrades offer a wealth of patient feedback. Pay attention not just to the star ratings but also to the content of the reviews.
- Consistency of Positive Feedback: Look for a pattern of consistently positive reviews regarding the surgeon’s results, bedside manner, staff professionalism, and clinic environment.
- Addressing Concerns: Even the best practices may receive a less-than-perfect review. Observe how the surgeon or clinic responds to these concerns. A transparent and helpful response can be a positive indicator.
Befobefore-and-afterleries
A surgeon’s portfolio of before-and-after photos is a visual testament to their capabilities. These galleries should be extensive, varied, and genuinely reflective of their work.
- Clear Lighting and Angles: Ensure the photos are taken under consistent lighting and from similar angles, allowing for a fair comparison of the before and after states.
- Diverse Patient Examples: Look for a variety of hair loss patterns, ages, and hair types represented in the gallery. This demonstrates the surgeon’s ability to achieve natural results across a broad spectrum of patients.
- Long-Term Results points to clinics will show results at different stages (e.g., 6 months, 12 months, 2 years) to determine the long-term viability and growth of the transplanted hair.
Patient Testimonials and Referrals
Direct testimonials and personal referrals from friends or acquaintances who have undergone a successful hair transplant can be invaluable. These provide firsthand accounts of the entire process, including consultation, surgery, and recovery.
- Personal Experiences: A direct referral from someone you trust offers a level of insight that online reviews cannot quite match. You can ask specific questions about their experience.
- Clinic Atmosphere: Testimonials often shed light on the clinic’s atmosphere, the staff’s demeanor, and the level of support provided before, during, and after the procedure.
If you’re considering a hair transplant in Chandler, Arizona, it’s essential to explore all your options before making a decision. A related article discusses various alternative hair restoration methods, including wigs, hairpieces, and hair systems, which can be beneficial for those who may not be ready for a surgical procedure.
You can read more about these alternatives in this informative piece on alternative hair restoration options. Understanding these choices can help you make a more informed decision about your hair restoration journey.
The Consultation Process
A sign of an ethical and skilled surgeon is their ability to communicate clearly, answer all your questions, and address your expectations for the procedure’s outcome. Do not expect miracles; expect measurable, natural improvement.
- Transparency About Risks and Benefits: The surgeon should openly discuss the potential risks, complications, and benefits of the procedure, ensuring you have a complete understanding before making a decision.
- Post-Operative Care Instructions: Clear and detailed instructions for post-operative care are crucial for optimal graft survival and healing. This should be discussed during the consultation.
- Cost Transparency: The total cost of the procedure, including surgeon’s fees, facility fees, and any follow-up appointments, should be clearly outlined without hidden charges.
In Chandler, Arizona, the journey to finding the best hair transplant surgeon is about more than just locating a medical professional; it’s about finding a partner who can meticulously sculpt your future appearance with a blend of scientific precision and artistic vision.
By rigorously evaluating qualifications, experience, artistic skill, patient feedback, and the thoroughness of the consultation process, you can navigate this important decision with confidence, emerging on the other side with not just a restored hairline but a renewed sense of self.
FAQs
What qualifications should I look for in the best hair transplant surgeon in Chandler, Arizona?
When choosing a hair transplant surgeon in Chandler, Arizona, look for board certification in dermatology or plastic surgery, extensive experience specifically in hair restoration, positive patient reviews, and before-and-after photos of previous procedures.
What types of hair transplant procedures are commonly offered by surgeons in Chandler?
Surgeons in Chandler typically offer Follicular Unit Extraction (FUE) and Follicular Unit Transplantation (FUT). Both methods involve transplanting hair follicles from a donor area to thinning or balding areas, with FUE being less invasive and leaving minimal scarring.
How much does a hair transplant usually cost in Chandler, Arizona?
The cost of a hair transplant in Chandler varies depending on the extent of hair loss and the number of grafts needed. On average, prices range from $4,000 to $15,000. It is best to consult with a surgeon for a personalized quote.
What is the typical recovery time after a hair transplant procedure?
Recovery time generally ranges from a few days to two weeks. Patients may experience some swelling, redness, and scabbing in the treated area, but most can return to normal activities within a week. Full hair growth results usually appear within 6 to 12 months.
Are hair transplant results permanent when performed by a qualified surgeon in Chandler?
Yes, hair transplants performed by experienced surgeons in Chandler are considered permanent because transplanted hair follicles are resistant to the hormone that causes hair loss. However, ongoing hair loss in non-transplanted areas may require additional treatments.
Maps Of Chandler, Arizona
Weather In Chandler, Arizona
Here is one Best Hair Transplant Surgeon in Chandler Arizona
Best Hair Transplant Surgeon in Chandler Arizona
Dr.Rejali Hair&Skin Restoration Center
Hair transplantation clinic
Scottsdale, AZ, United States
+1 480-945-2688
Robotic Hair Rx
Hair transplantation clinic
Tempe, AZ, United States
+1 480-597-3488
Elite Plastic Surgery – Chandler AZ
Plastic surgery clinic
Chandler, AZ, United States
+1 480-535-9867
RELATED TOPICS ABOUT Best Hair Transplant Surgeon in Chandler Arizona
Top Hair Restoration Clinics in Chandler Arizona
Best FUE Hair Transplant Surgeons in Chandler Arizona
Chandler Arizona’s Top-rated Hair Transplant Specialists
Most Recommended Hair Transplant Surgeons in Chandler Arizona
Best Hair Transplant Clinics in Chandler Arizona
Chandler Arizona’s Best Hair Loss Treatments
Top-rated Scalp Micropigmentation Specialists in Chandler Arizona
Best PRP Therapy for Hair Loss in Chandler Arizona
Top Hair Transplant Surgeons for Women in Chandler Arizona
Chandler Arizona’s Highest Rated Hair Transplant Surgeons